There's a really great tutorial on Area that's been there for a while. It briefly steps you through texturing a character in Mudbox, then gets into creating a hairstyle in Maya. Please note that it's for Shave and a Haircut, not Maya Hair. It's really great and worth the look if you're just getting started with Shave and a Haircut.
I know it's odd (pun!), but I needed to have an intField only accept odd numbers. Initially, I'd done something like this:
import maya.cmds as mc
def exampleUI():
exampleWin = mc.window()
mc.columnLayout()
testField = mc.intField(value = 63)
number = mc.intField(testField, query = True, value = True)
mc.button(label = "OK", command = lambda *args: exampleDef(number) )
mc.showWindow( exampleWin )
def exampleDef(number):
if number % 2 != 0:
print"It's odd! Yay!"else:
print"Your number is even, prepare to die!"
If the value in the intField was odd, continue. If the value was even, error out and prompt the user to change it. But it didn't do what I wanted, which was to force an odd number. I didn't know if this was possible, but it sounded like it should have been. I asked for help on the CGTalk Maya Programming forum and I learned two things. Click here to see the thread
1) Use the intfield's changeCommand flag. After the value in the field changed, it would run another block of code that would check whether or not the number was odd. In the event it found an even number, it would either reset the value or increase the number by 1.
2) Another person agreed with the solution above and took it a step further. He suggested this, and I think it's brilliant:
I really like this bit here "oddInt = integer 2*2+1". I wondered, why not just check to see if the number was even, and then say + 1 and return the new value? You can do this and it will work but it would take three lines of code. Here, it was done with one.
When you divide an int, most (if not all) languages will just round down to the next whole number. Example, 3/2 will equal 1, not 1.5 (that would be a float, not an integer).
If we continue to use the number 3 as our example, 3/2 = 1. Then 1*2 = 2 and finally, 2 + 1 = 3. So you'd end up with your original odd number, 3. But say we had an even number: 4. 4/2 = 2, 2*2 = 4 then 4 + 1 = 5. See? "integer/2*2+1", will always produce an odd number and this number will be placed into the intField automatically because of the changeCommand flag.
In the end, either way works. As a side note, if you wanted to round down, you could just say -1 instead of +1.
Fun stuff.
I needed this for my hair script, which I'm converting to Python. Hopefully I'll have more updates on that soon.
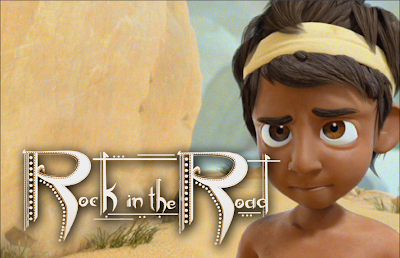
There's a really great CGSociety feature of Rock in the Road that talks about the road to starting and completing the project. There's also a forum discussion if you're interested. If you haven't already seen Rock in the Road, take a few moments and watch it.
How much detail should your simulation mesh have? When do you have too little? When is it too dense?
That's a good question.
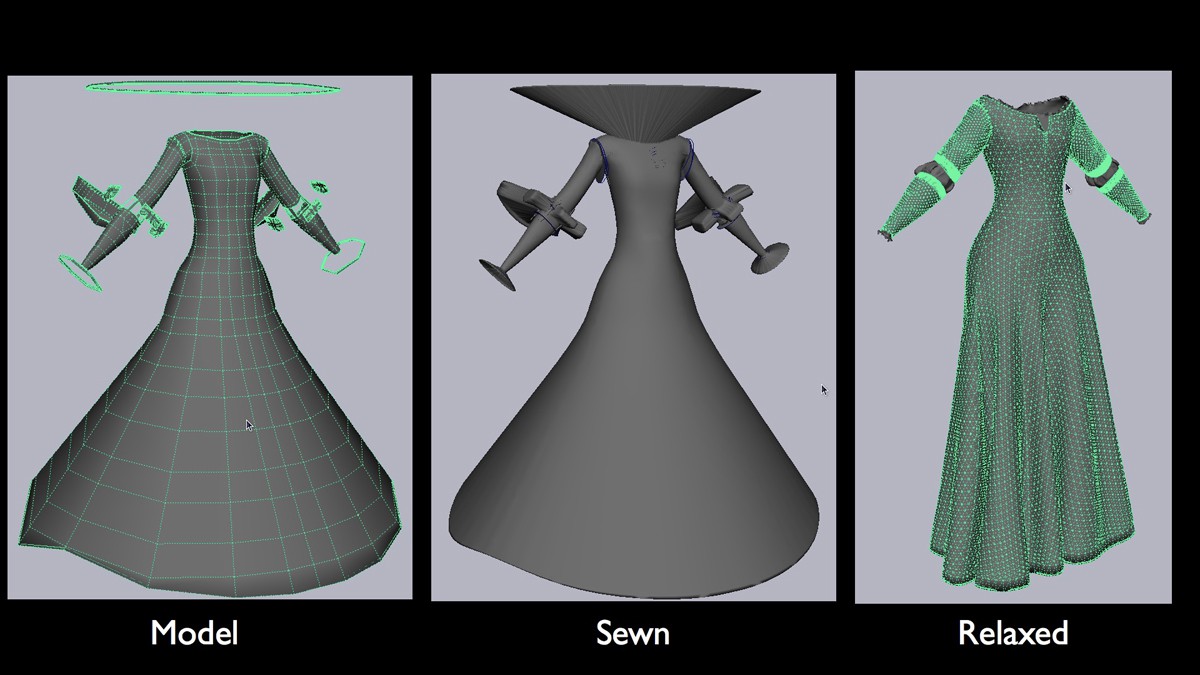
I saw this image a week or so before I went to SIGGRAPH:
It's one of Merida's simulation gowns from Brave. I think they use a proprietary simulation software (it looks like some super variant of Qualoth to me), but look a the detail they have in the final mesh. When I went to SIGGRAPH I was lucky enough to ask Claudia Chung (!!!) a question. What are their simulation times like? Did they have to wait minutes and minutes per frame, or was it a little faster? She told me that if it was taking longer than a minute or two a frame, then something was very, very wrong.
For people with average computers like me, I show them this:
(click to view the original size)
Which one of these resembles your simulation mesh?
#1 Doesn't have enough information. You can work with it, but it probably won't fold well over corners and you won't get nice billowing and wrinkling in your cloth.
#2 Is great and my personal choice. Sim times are good, and you can get great detail (wrinkles, billowing as the character moves, nice overlap) out of it.
#3 Is too much. If you have a fantastic computer, you might be able to pull it off. Maybe.
#4 ... I hope your computer has a will.
I will say this. Not every cloth object needs to have the same amount of detail. If it's something that's not seen as much (like an underskirt), see if you can get by with less. The same goes if your final cloth mesh is thick. Thick cloth (like leather) wouldn't billow in the wind and fold in on itself as much as something thin (like silk), so you could probably get by with less detail.
EDIT:
Here's something else to keep in mind.
As a reader and colleague pointed out, the poly count of your mesh is also linked to how your simulation works, not just it's visual level of detail. Take for example the four planes above. The same settings wouldn't work for all four planes. If you get the first one to work with a stretch resistance value of 30, the second one will probably need a stretch resistance value of 65 or 70 in order to behave, and so on and so forth.
I hate floating windows with the passion of 1,000 red hot suns. There was nothing I could do about it in version of Maya older than 2011, but now I have the ability to dock windows. I talked about this in an earlier entry.
I've been watching a series of building UI's in Python by Jeremy Ernst that is just fantastic (and he hates floating windows too! Yay!) He uses the dockControl command religiously after video #4. It's fantastic, but he never really mentions the fact that your script will error out if you use dockControl in a version of Maya that's older than 2011. He does briefly touch on the fact that you can make docking true or false, but I thought I'd go ahead and share what I did.
If you're using Maya 2011 and higher, the window will dock. If you're using Maya 2010 or lower, the window will float.
This may not be the most "efficient" way to do this, but it works. If you know of a better or cleaner way to execute this, feel free to tell me. I'm not offended if someone sends me an e-mail that says "idiot, you could do this in one line if---"
If you have no idea what the widgets dictionary in this script does, watch Jeremy Ernst's Building Maya Interfaces with Python video series, specifically video #6. That's where he introduces it.
def createUI(self, winName, dock): #If Maya version is 2011 and above, create a dockable window, else create a floating window if dock == True: if mc.dockControl(winName + "_dock", exists = True) or mc.window(winName, exists = True): mc.deleteUI(winName + "_dock") else: if mc.window(winName, exists = True): mc.deleteUI(winName)
self.widgets["window"] = mc.window(winName, title = "Suit Suite v. 0.1", width = 350, height = 500) self.widgets["mainLayout"] = mc.columnLayout(width = 350, height = 500) if dock == True: mc.dockControl(winName + "_dock", label = "Suit Suite v. 0.1", area = "left", allowedArea = "left", content = self.widgets["window"] ) else: mc.showWindow(self.widgets["window"])
I don't take full advantage of the fact that Python is an object oriented language. I'm so used to the procedural MEL that I limit myself in Python. I was writing a hair script in MEL and decided that Python would be better, but I ended up just writing it in Python the same way I'd done it in MEL. After figuring out Python's classes and going back to my hair script... wow. Classes make things so much easier. I'm still muddling through, but I'm so excited.
I love Python, but there are some things about Python that I've really been struggling with. Mainly I'd been struggling with classes, __init__ and the use of self as an argument. When I saw something like this:
class Introduction:
def __init__ (self, name):
self.name = name
I had a small stroke. What does that mean? What is the purpose of a class? Why does "self" keep popping up everywhere?! I just didn't get it, and every explanation I read was so technical and hard to understand. Well, I'm an auditory learner so I went to YouTube to see if anyone had explained it. When I heard this man's tutorial, everything clicked. If you're having trouble like I was, I think you should take the 12 minutes to watch and listen to this video.
I hope that one day I'll make it, in the meantime I'll keep brushing up on my Python. I love Python. Once I get the hang of classes, I'll be unstoppable!
The project in my demo reel is Rock in the Road, a 12 minute animated short that I had the pleasure of working on when I was in college. It's finished and available to view. I hope you'll enjoy it in HD and share the link with your friends and family!
In a faraway land, a king governed his realm so well that his people were in want of nothing. As the years passed, the king noticed his people had become lazy and selfish, so he devised a simple test to show them the value of others. As a young boy unknowingly faces the challenge, the future of the kingdom is built on the strength of his character.
In the fall of 2007, Southern Adventist University’s animation students set out to create a three-minute short film based on a simple parable. This artistic venture, intended to be completed during one year, turned into a five-year journey. The result is the twelve-minute animated short, "Rock in the Road."
The scope of the project grew as the team became interested in telling a longer form story. But as students who started it graduated, and other projects were begun, finishing the short became its own “rock in the road.” However, professors and students persevered, realizing the completion of the film would benefit everyone who was involved. A small, dedicated crew worked on it between other projects to finish the film at the end of the 2012 school year.
Yeah, I'm a copy cat. A friend reviewed Brave. I'd been meaning to do the same, but I didn't put fingers to keys until she did. Oh well.
Brave was a fantastic, beautiful movie that everyone should see. More talented people that I have reviewed this movie, so I'm not going to. But I had three issues with the movie that I haven't seen anyone else mention. Maybe this isn't the place for it, but here we go:
(MASSIVE SPOILERS!!)
1) I never felt like Merida was the star of her own movie. Just when I was getting comfortable with her character on screen, Queen Elinor stole the show and never gave it back. The best example of this is the ending. Merida doesn't get to have a showdown with Mor'du, the movie's antagonist. Queen Elinor is the one who fights and defeats him. I would have loved to see the two take equal part in the battle, but it just didn't happen and I HATED that.
I think Brave could have been a better story if it focused on Queen Elinor from the start, or if the creators of the movie put Merida and her mother in a situation where they both had the same risks/rewards. As it stands, Elinor had the worst of it. If Merida didn't reverse the curse, Elinor would remain a bear forever and Merida would have one heckuva guilty conscience. So fairly early on in the movie, I feel more sympathy for Queen Elinor and I'm mad at Merida for putting her in this situation. I don't think this is what the creators were going for.
2. The creators didn't take advantage of this huge world they created. We get sweeping views of a vast country and we hear about other clans yet Merida never travels more than 10 miles from her house. (Ok, that's a random number I pulled from the sky, but you get my meaning). It would have been nice to see Merida and her mother travel to more places than the cabin and the ruins. It also would would have been nice to see more from Merida's three suitors and their clans. To those who would argue that you can only get so much into one movie, I call BS. Look at how many unique locations they had in The Incredibles, or even A Bug's Life.
3. Mor'du is the most random, USELESS antagonist ever. I don't think his character was integrated into the story well. In my opinion, his presence in the movie wasn't needed at all. If the witch who gave Merida the cursed pie said, "to break the spell, you need a tooth of Mor'du!!" or something random like that, I'd get it. As it stands, I feel like he was just there to add an element of action and danger to the movie. That in and of itself isn't a bad thing, but I just felt like he was tacked on as an afterthought.
Nitpicking issue 3.5: Why is it that whenever a woman is a lead in an animated feature, there's an issue with marriage/a man (i.e. Jasmine, Cinderella, Ariel, Belle, [I can keep going]) . Why couldn't the issue be something more interesting? Leave behind her dreams of freedom and leading the clan? Not wanting to go through a rite-of-passage ritual of killing a bear (which, by the way, would have been a fun way to introduce and explain Mor'du). Heck, I could have settled for Merida not wanting to take up tap-dancing. But no, the straw that broke the camels back was the thought of an arranged marriage.
It never fails. When I try to explain just what I do, people look at me like I'm eating a cheese and whipped cream sandwich. It's hard to explain to people that from beginning to end, dozens of people, not just me, had their hand on one shot to make it what it is. It's even harder to explain my title because my title isn't concrete. Depending on where I work, I could be called a:
Character Effects TD
Technical Animator
Hair/Cloth TD
Character TD
Simulation TD
So I think I can kill 3 birds with one stone with this post. What are other peoples titles? What is a Cloth/Hair TD? What does a Cloth/Hair TD do?
Before I do that:
What's a TD?
Ask 10 different people and you'll get 15 different answers. TD stands to Technical Director, and it's usually associated with a job that's, for lack of a better explanation, more technical than artistic (for example, an animator isn't called an Animation TD, but someone who creates rigs, a highly technical job, is called a Character TD). It's a common title and can be misleading because Technical Directors aren't necessarily directors and some studios don't even use the title. A Lighting TD can also be called a Lighter. An Effects TD can also be called an Effects Artist. It's silly, but hopefully you get the idea.
So, about who does what. We can just go in production order. This is the [simplified!!!] production pipeline. Keep in mind that many of these process overlap, but I'll try not to complicate things.
Pre-production
1) Story, Script - Who does this? The Writer and Screen Writer. I feel bad for not putting a description here, but it's fairly self explanitory.
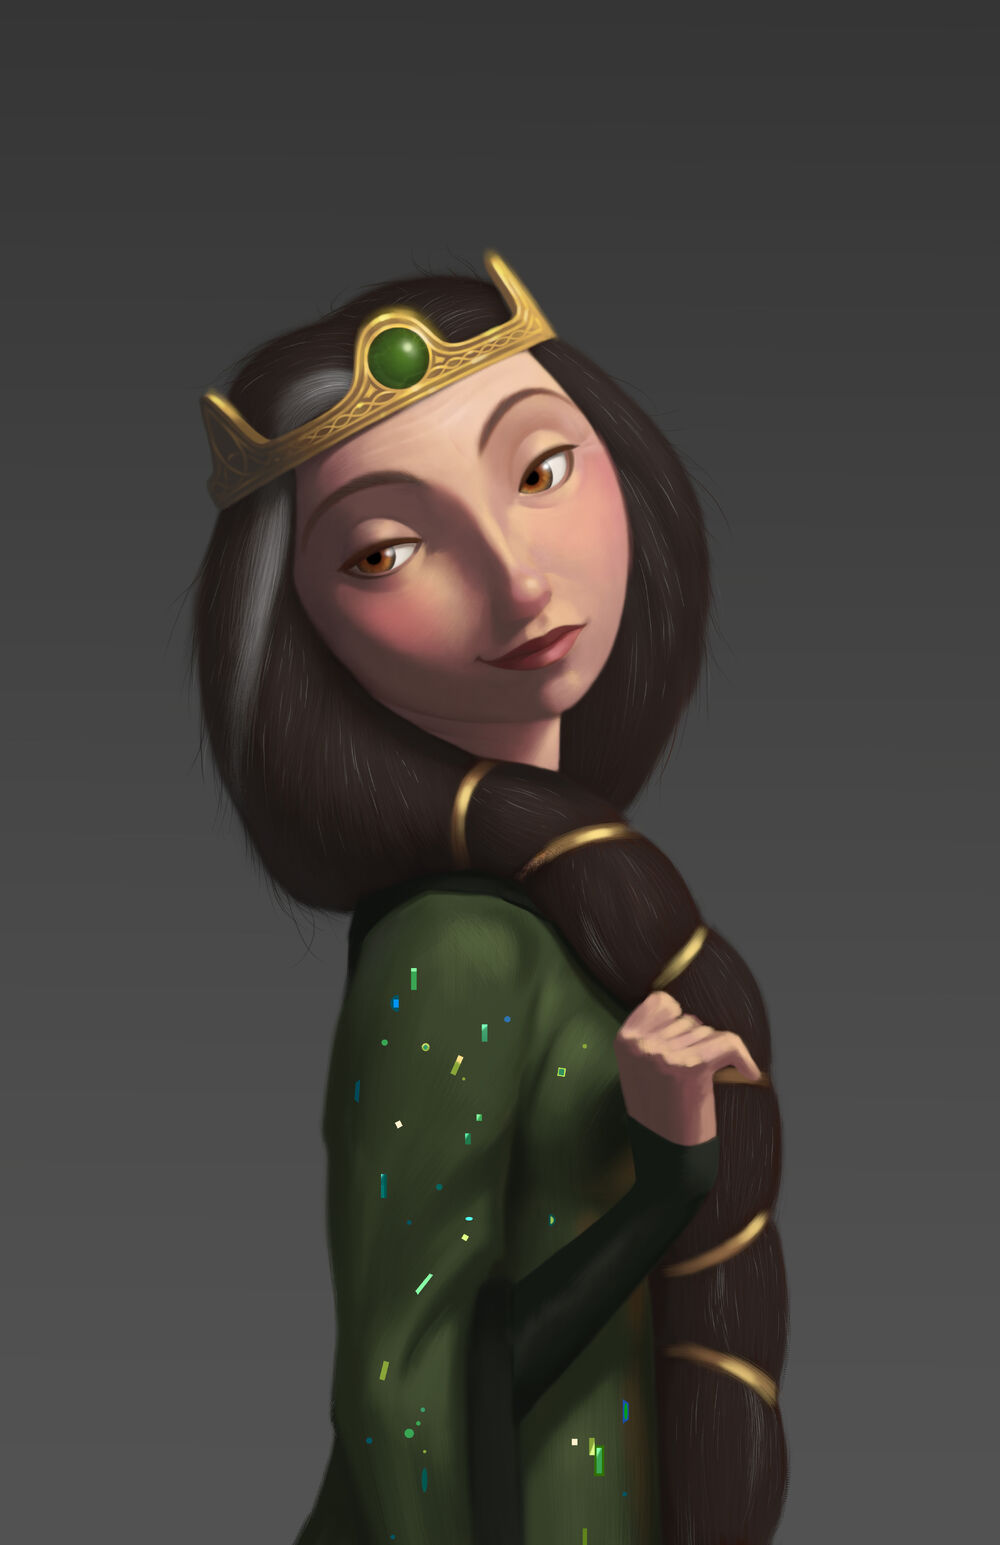
2) Concept Art - Who does this? A Visual Development Artist. They handle character design, environment design, sometimes they even handle color. This is a broad field that can be broken down further. For instance, a Character Designer handles how a character will look. An Environment Artist handles how the environment, buildings and scenery will look, but it's all under the umbrella of Concept Art. In a small studio, one person can be in charge of all of this. In a large studio (Pixar, Disney, Dreamworks), you get more specialized.
Concept art of Merida(left) and Elinor(right) from Pixar's "Brave"
3) Story boarder - Who does this? A Storyboard Artist. After the script is [somewhat] finalized, the story boarder draws the story in panels, almost like a comic strip. For a feature length film, you can end up with thousands and thousands of drawings.
Some storyboards from Pixar's "Brave"
4) Layout - Who does this? A Layout Artist. They stage each shot. What that means is they place props, characters, the camera in the scene.
5) Modeling - Who does this? A Modeler. Modelers are responsible for actually sculpting/creating a character in 3D, using the 2D pencil, ink and painted character drawings as reference. Modelers are also responsible for creating props, environment sets (buildings, cars, spaceships, mountains, trees, you name it), and pretty much any object you see in a 3D movie.
Merida's model and hair curves.
Production
6) Rigging - Who does this? A Character TD. A Character TD gives the character the ability to move by "rigging" it, or giving it a skeleton and muscle system in 3D. Before the rigger/Character TD touches a character, the character is just a statue in 3D, without the ability to do anything. This is a very, VERY technical field to go into.
An example of a character's rig.
7) Animation - Who does this. An Animator. An animator gives a character life. They actually make the character move, react, all that jazz.
8) Hair/Cloth/Fur Simulation - Who does this? ME!!!! A Character FX TD. Character FX TD's make hair, cloth and fur move on a character. Sometimes, other things are simulated too, like ropes, chains, grass, leaves in trees, and some props. Depending on where you work, they actually construct and tailor the characters clothes in 3D. (Pixar has Tailoring TD's to do this specifically.) Sometimes the people who do character simulation are also responsible for scene clean up. They make sure that nothing is going through itself, things aren't jittering or slipping, or anything like that.
Animation tests as well as cloth/hair setup and tests.
Special Effects - Who does this? An Effects TD. Particles, dust, water, fire, smoke, lightning, etc., etc., etc. are handled by them. This is also a very technical field.
Lighting - Who does this? A Lighter, or Lighting TD. They're responsible for actually placing lights in the scene.
Left - Unlit, Right - fully lit
Rendering - Who does this? Titles vary. Render I/O Admin? I'll admit that I'm not sure of their titles. This is a hard process for me to explain, so I won't even try. This is an explination from Justin Slick: "Rendering is the most technically complex aspect of 3D production, but it can actually be understood quite easily in the context of an analogy: Much like a film photographer must develop and print his photos before they can be displayed, computer graphics professionals are burdened a similar necessity.
When an artist is working on a 3D scene, the models he manipulates are actually a mathematical representation of points and surfaces (more specifically, vertices and polygons) in three-dimensional space. [They] translate the scene from a mathematical approximation to a finalized 2D image."
Post Production
Compositing - Who does this? A Compositor. They're responsible for bringing together all of the visual elements that were rendered. Effects, animation, backgrounds are all combined into one coherent image.
Video Editing - Who does this? An Editor. Again, this is an answer that far surpasses what I could come up with: "An editor polishes and refines, he directs the focus of the story or article or movie along a particular course. He cuts out what doesn’t fit, what is unessential to the purpose of the story. He enhances the major points, drawing attention to places where the audience should focus."
Sound Editing - Who does this? An Audio Engineer. Fairly self explanatory, but an audio engineer is responsible for the sound and sound editing. There are people who are specifically responsible for sound effects though.
Did I skip a few things? Yes. Did I talk WAY more than I should have? Probably. But hopefully that'll start to answer some questions.
Know this about me: I don't like speaking to people I don't know. I'm award and tall and I feel like I'm looming over people like some weird gargoyle statue. But I really couldn't forgive myself if I didn't say hello. I pretty much ambushed her and introduced myself.
What I wanted to say:
You're my hero! You're the smartest, most talented, most amazing woman ever! I want to get a job at Pixar just so I can look over your shoulder and learn EVERYTHING!! o___o The hair and cloth in Brave was AMAZING!! Teach me everything you know. RIGHT NOW!!!
What I actually said:
Hi, I'm Melissa. You're such an inspiration to me. ...bye.
Still kind of creepy, right? But at least I got to say hello. I wanted to take a picture... but that would have been too much. Or would it? Yeah, probably.
...at some point today. I don't have internet access in my hotel, so I'm using SIGGRAPH's wireless service to upload my reel. It's well over 1 gig so it's taking forever, but it will be up by 2pm PST (unless this decides to stop uploading).
I am learning so vet very much! As a CFX TD, I was really REALLY excited for the simulation section with Claudia Chung (love her!). There are so many things that I'd like to test on my own like multiple hair systems on one character to mic really thick hair. We sort of did that for Steve ( the red haired man on my demo reel) but his hair is a series of polygons. I want to go crazy with actual hair.
I'm sure I'll edit this post tonight, but I just have to say again how amped I am. I would love to work in dynamic simulation forever and ever!!
I'm still working on it, but I ran into a problem that, for the longest time, I had no idea how to solve. I asked for help on CGTalk, but no one ever responded. Here's how far I got on my script before I ran into a titanium wall:
Create a UI (done for testing purposes, but as I add to/delete code, I'll update the UI to reflect these changes)
Duplicate the hair mesh, group it
If the hair is made of polygons, convert them to NURBS, group the NURBS
Get the surface curves
Allow the user to choose which way the hair is growing (if in the U direction, select all U spans and the leading V span. If in the V direction, choose all V spans and the leading U span. The leading span [or "root" as I've been calling it] is the span the hair grows from, and then the hair length follows the "growing" spans.)
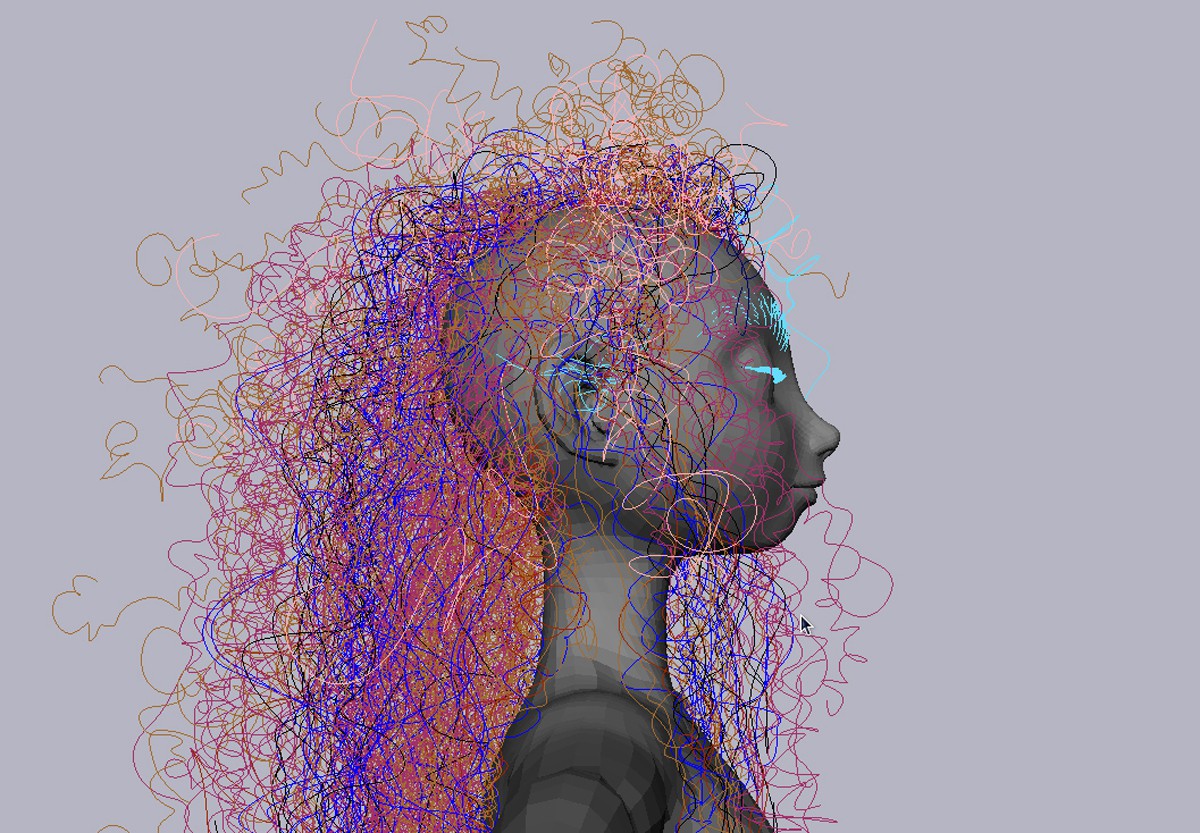
That all works, and moving the original polygon hair and/or the updated NURBS hair effects the position of the curves perfectly, meaning, once the hair is rigged, you can animate the hair and the dynamic hair curves will follow. So what's the problem?
If a modeler modeled a characters hair on one side, then mirrored it, the direction of the curves changes. If they deleted the history then I'm SOL ("sadly" out of luck).
Note the image above. Both of the highlighted spans are technically the U spans, but because one was mirrored, U now looks like V and V looks like U. I've been looking for a way to automatically detect if the spans are uniform and heading in the same direction, but I haven't had any luck. Then I figured I'd just go for a dirty solution. I hate it, but I really don't have much of a choice. My solution is to have the user select the pieces of hair where the curves were going in the wrong direction and press a Switch Direction button. It would use the Reverse Surface Direction command, which is pretty self explanatory. In essence, it will switch U and V spans and all will be right with the world.
This is what would have to happen in my Switch Direction proc:
Store the name of the curves, groups, etc. that have been created for this piece of hair
Delete EVERYTHING the script has created for this piece of hair so far
Reverse Surface Direction command
Recreate and restore the names to everything in the proper order
Make sure everything goes to the proper group
I looked in the GMH script that a reader recommended to me and got my hands on it. It's a pretty darn fantastic script and I learned a LOT from it, but it has the same flaw mine currently has. If the user mirrored some of their hair, the script will fail and there is no way to fix it. But I THINK with the steps I outlined above, I can fix the problem. Now that I'm getting a little more comfortable with Python, I think I can use a mix of MEL and Python to do this efficiently.
One months salary later and... it's official. I'm going to SIGGRAPH this year! Will anyone else be there? I hope I get to meet some more hair/cloth TDs. I'll be there from Sunday to Thursday and I plan to do as much as I can while I'm there. I'm ridiculously excited! I'm almost ready to go. I just need to make sure everything on my list is checked off.
Finish new demo reel and upload it
Print business cards
Update Resume
Create a few self playing DVD's with my demo reel/other information in case someone wants it
Buy clothes that fit (yeah, I kinda lost 120lbs and my clothes situation is pretty crazy)
Print out everything I need for the flight, hotel and SIGGRAPH
Pack
Contact some studios/companies before hand and setting up an interview (done to a small extent)
Make sure my $$$ is in order
I'm cutting it pretty close with some of those things, but my schedule has been beyond intense these past few months so my progress with this has been slow. Oh well. I'll get it done.
If you're interested in hair simulation at all, I'm begging you to read this article. But be aware, there are one or two small SPOILERS.
I was very inspired (and intimidated) by this article. There's so much I have to learn and getting a job where people know this much would be amazing and terrifying. Well, that's the fun of it all, isn't it?
I think this document was created by a man named Joel Stutz, but I'm not sure. If I'm wrong, please let me know and I'll make any necessary corrections to this post.
He created a document that explains what 95% of the nCloth attributes are and what they do. If you're an nCloth novice, or if Maya's help docs are confusing to you, I highly implore you to read it.
I started testing my script on modeled hair instead of polygon planes and I ran into three glitches.
Glitch 1 - Happens if the modeler modeled hair for one half of the body then mirrored it to the other half. When I create and duplicate my curves, it will duplicate the U spans on one side, but the V spans on the other. I "think" I can fix this glitch by rebuilding all of my NURB surfaces once they've been created. I didn't want to do this because it's messy, but I'll just do some "create grouping" and hopefully no one will notice...
Glitch 2 - Happens if the modeler has combined all of the small hair meshes into one super mesh. The script still works, I think it'll make rigging the original hair a lot harder.
Glitch 3 - Happens when the modeler has groups in groups. My script works by selecting one hair group instead of marquee selecting all of the hair. So if you select one top group, my script will end up duplicating the groups IN that group then when a for loop get to that transform node, the entire script will stop working. Ugh, what a mess.
Remember that nuke explosion that I talk about once every 6 months? I'm STILL working on it lol. I got a little side tracked with ground explosions. I'm learning about shaping my fluids with multiple emitters and volume axis fields. I'm also learning about lighting my fluids and rendering them out in separate passes. Fun stuff. I'm still inexperienced when it comes to texturing fluids, so if anyone out there has any good tips/resources they'd like to share, I'm all ears!
Anyway, my hair script!
Progress! The polygons to nurbs feature works better than I could have hoped for. I had to completely destroy and rearrange 50% of what I had to get it to work, but it works! Of course, if you could nest procedures in MEL, I wouldn't have had any problems. (Another reason for me to start working with Python). My curve duplication is well on it's way to working too. I'm just trying to figure out the best way to name my curves. I know I don't HAVE to, but I think it looks bad to have duplicatedCurve40388 in your scene, even if the user will never see it.
The next thing I have to worry about is grouping everything so the user isn't left with a messy scene, but that's not going to be too bad.
I don't know what I want to tackle once I get the curve creation thing to work. I could create the paint effects hair, or rig the hair. Rigging will be harder, and it's about 60% of the entire script so I might tackle that first and get it out of the way.
I'm geeking out over the nHair demonstration in this video! Features I love already:
Adjusting the thickness of hair strands.
I'm hoping that attributes are paintable here like they are with other nObjects.
Collision. The hair looks like it reacts to itself better (and faster) and we'll be able to set up complex collision objects instead of being confined to the HORRIBLE collision spheres and cubes that just don't work well at all.
It's ability to interact with other nObjects like nCloth and nParticles.
CONSTRAINTS THAT DON'T SUCK!!!
I hope that in the future we'll get to see tools (brush, combs [scissors? Please???]) that will aid in the styling process. But I'm really happy with the people at Autodesk right now. Really, really happy. Seriously. I'm the happiest girl in the world right now. I can't wait to get my hands on this.
I have a dream. A dream of being fluent in MEL, Python, Perl, C++ and LINUX/UNIX shell scripting. I love programming. I really, really REALLY, REALLY do. I just wish I were better at it. I can scrape along, ask the right questions when I'm stuck, but there's so much more for me to learn.
I want to know more. I want to be better. I've decided to take a Fundamentals of Unix/Linux class as well as a C++ class this summer, but I started studying early. I've learned a lot already. There are still things I struggle with, but I know I'll get the hang of it. I hope. MEL, Python now C++. Let's hope my brain doesn't mix these all up.
I wanted to learn how to put tabs on the side of a window and make it a part of Maya. I thought there was some hidden way to do this with a tabLayout, come to find out this wasn't a tabLayout, but were several windows with dock controls. I'd never heard of dock controls until today.
dockControl Create a dockable control, also known as tool palette or utility window. Dock controls are secondary windows placed in the dock area around the central control in a main window. Dock windows can be moved inside their current area, moved into new areas and floated (e.g. undocked). Dock control consists of a title bar and the content area. The titlebar displays the dock control window title, a float button and a close button. Depending on the state of the dock control, the float and close buttons may be either disabled or not shown at all.
(Pardon my sloppy mouse writing. My tablet is downstairs and I'm too lazy to get it so...)
I'd wanted to do this with my hair script since day 1 but I just couldn't figure out how.
I found out dockControl was something introduced in Maya 2011 (figures. I've been using Maya 2010 until a few months ago). So, I can do this, but if someone wants to use this script in Maya 2010 or an earlier version, it will error out. I've decided to use dockControl, and build a second UI for users who have Maya 2010 and earlier.
But how will my script know?!
The handy command:
getApplicationVersionAsFloat
Return the application version number as a float value. If you use the "about -version" command you get a string value containing the application version. Strings of course may not be used in comparisons like: if ($version > 3.5) { ... }; This procedure will return a float value containing the major and minor version number. The major version will be separated from the minor version by a decimal. For example, 4.0.3 will return a float value of 4.03.
So I can do:
global proc $ss_hairDo(){ if (getApplicationVersionAsFloat() >= 2011){ do my dockable window; }else{ do the safe window; } }
Sad thing is, this command is only available in MEL. I guess my tool will end up being a blend of Python and MEL, which isn't so bad. There are a lot of things I'm going to gut out and replace with Python since it does things more efficiently.
Anyway, it shouldn't be too bad creating a second window, just ignore all of the dockControl stuff, and it should be fine.
Rather I should say lack of progress. I lost my most recent file. I have no idea what happened to it, but it's gone. I don't feel too horribly about it. Even though I spent a good 12 hours of it, 10 of it was spent researching and understanding what I was doing. I remember what I did, so now it's a matter of retyping the ~50 lines of code that I'm missing, which shouldn't take more than an hour or two. <== *famous last words*
Estimated Progress = 10% complete
Issues I'm facing:
1) Redesigning the GUI. The current one is fugly and I only slapped everything on so I could test various sections of my code.
2) Incrementing, starting from the last object number in a group. If there are 10 objects in a group, and someone runs this script again, I want them to have the option of just deleting the group and renumbering everything, or starting from 11 and going on from there. I'm not sure how to increment, starting from the last number so I'm asking around.
I've been working on a hair script for a while, and talking about it even longer. I guess this is a good place to officially start the progress report that no one will read.
I've been working on a MEL version and a Python version of a tool that I'm calling Hair Do. It will take a modeled set of Polygon or NURBS objects and create a realistic hair style based on the look of these modeled objects, henceforth referred to as "patches". These hair patches can also be rigged with this tool with the click of a button, allowing animators to position and animate the hair however they like, or they can leave the hair dynamic, or they can blend and switch between the two modes. If the user decides they want realistic hair, it can be driven by the animated hair patches meaning if the patches are animated, the realistic hair will follow.
Hopefully I'll think of a more concise way of saying this.
I've been making real progress with the MEL... I've been chickening out on the Python. I wanted to do this in Python to force myself to get comfortable with it. I'm a sink or swim kind of girl. Diving in the deep end of the pool is the fastest way to learn how to swim. But when progress was slow I started to do it in MEL, then "translate" it to Python later. Now, I realize I haven't done anything in Python for over a week.
*shame*
I'll get back on it. I want to honestly say I have a good grasp on Python if someone ever asks me.
So far, by the things I've crossed off my to do list, I'd estimate that my script is about 8% - 10% done. I know that seems small, but there's a LOT of ground to cover, and that ~9% represents a couple hundred lines of code, so I can't complain. I'm working super hard so that I can include a working version of it on my demo reel. So far, I've come across two really difficult things.
1. Converting polys to NURBS. That in and of itself isn't hard. You just do Polygons to Subdiv, then Subdiv to NURBS. Then you can rebuild the NURBS object with a user specified value for the U and V spans. It's making the end result look good that's making this whole process a pain in the... booty. So far my results on semi-complex patches have been horrible at best.
2. If the user wants to keep their polygon hair and rig it, I still need to figure out a way to automate the rigging process. I think I have a solution, but it's still a pretty jumbled in my head. I think I can do this:
Use the method outlined in #1 to create NURBS surfaces, identical to the polygon meshes.
Create then extract the center curve of each NURBS surface.
Add/delete knots so that the number of CVs matches the amount of joints the user wants on their rigged hair.
Place a joint on each CV.
Smooth bind the joints to the polygon patch.
Delete the unwanted NURBS objects (or keep it, depending on other things).
Then my script will just pick up, doing what it does which is - make it possible to manually AND dynamically animate this hair, and make it possible to switch and blend between manual and dynamic mode. Funny as it sounds, THAT'S the easy part! But that bullet list just looks crazy to me. There HAS to be a more efficient way of doing this. I guess it doesn't matter as long as it works, but I'll keep looking into it.
Anyway, I've been up all night working on this. I'll have come back to it with a set of fresh eyes.
I've been looking at a lot of demo reels, personal sites and things of that nature lately. Many people have blogs attached to their main site, but I use my blog as my main site. Some people have their blog entries on the main page, and others have their demo reels on the main page.
Should my demo reel be the first thing people see, or should my blog entries be #1? I've been thinking about that a lot lately, and I'm not sure what I should do. I might make my demo reel this sites main attraction, I might not. I haven't decided.
I don't expect a response or anything, but if you come here and randomly see my demo reel filling the screen instead of my rants, don't say I didn't warn you.
I drove back to my university for a visit, and decided to stay a week. Not only was I able to grab the rendered version of the shots in my demo reel, I was able to start doing cloth work for a short they're working on. It feels great to be working on actual scenes again! I have to confess, I haven't done any real cloth simulation since I graduated so this has been a lot of fun. I also have to figure out how I want to simulate this whip. I'm thinking a hair curve would work better than nCloth, but we'll see what I can pull out of my hat.
^_^ *squee*
...don't look at me like that. Simming hair and cloth IS fun!
I've also been hard at work creating the MEL version of my hair styling tool. The UI is almost done, but that's the easiest part of the entire thing, so that's not saying much. Anyway, let's hope I can finish it for SIGGRAPH. And let's hope I can actually go to SIGGRAPH.
Last year I really wanted to go to SIGGRAPH and pass my demo reel around, meet new people, see the sights and all that jazz, but my truck decided to DIE and the $1,100 dollars I'd saved vanished over night. Well, I hope I can make it this year. I'm working on a Python/MEL tool that will be the crown jewel of my demo reel if I finish it. If I don't get hired or anything, I hope the pro's can give me tips on my demo reel, which I hope I can finish updating by the end of April.
~Melissa
P.S. I haven't forgotten about that nCloth for Novices video. I'll fix it, I swear!
I love everything: animation, hair/cloth simulation, lighting, rendering... but I have such a soft spot in my heart for rigging. Admittedly, my knowledge on the process is pretty basic but I know enough to know something amazing when I see it. The Cenk character by Ozgur Aydogu is great on it's own merits, but this facial rig is one of the best I've seen. I absolutely LOVE the procedural breathing and free transform head parts features. The character itself is very expressive, facial deformations are spot on and the animation... so, so good. It's a shame to see good facial rigs subjected to horrible test animation and I'm so glad that doesn't happen here. From beginning to end, every aspect of character development and creation looks like it was handled with great care and the result is a top notch product.
I'm excited about the nHair test the Autodesk people have released. Have you seen it?
If it comes with styling tools, I'm pretty sure I'd just die of happiness.
Why should we care about this? Because Maya hair/fur, as it is now, sucks. And not in the fun way.
[Begin incomprehensible rant]
1. Maya hair and fur distribution is TOTALLY UV dependent. You have to spend hours laying out UV's if your character has full body fur. If you just have to tweak your UV's, you run the risk of destroying your hair/fur style. I don't want to have to layout UV's just to style hair!
2. Styling Maya hair and fur requires the patience of Job. It takes forever just to figure out how to do it. In fact, I'm convinced that it's impossible to style Maya hair just using Maya hair tools. There are no styling tools whatsoever. Ok, yes, there are constraints, fields, collision objects (they suck)... but there are no brush and comb to help move hair around. Adjusting length is a pain.
There are two ways that I've come across that make for good styling (you're welcome internet):
A.
Model a lo res hair volume with NURBS (the man in the example video uses curves, but my way is faster).
Draw guide curves on this surface.
Convert these curves to hair guide curves.
Color, texture, simulate the hair.
I commented on the video above. This method is brilliant. You should look at his demo reel. (He worked on Harry Potter: Deathly Hallows pt. 1 which is so cool!!)
B.
Model hair patches using NURBS.
Duplicate the curves.
Convert these curves to hair guides.
Simulate the hair.
While this is a video demonstrating a MEL tool that a man wrote, everything that's done there can be done manually, and he pretty much follows the method I outlined. The great thing about this is, you can change the hair on the NURBS level and the actual hair will reflect this change. This method takes longer, but you have the option of rigging this hair which is a HUGE plus.
I wish I could figure out how this man scripted finding the center curve for each hair section, but he speaks Japanese so I can't ask =( Really, I'm stumped. The center curve can't be the same value all the time, so how did he do it?! Grr...
C.
Style a series of curves.
Convert these curves to hair guides.
I don't have a video for that one. I find that this is what most people do so. This way is the hardest to me. I don't like doing it.
The problem is, you shouldn't be forced to do any of those things. Shave and a Haircut allows you to style and cut the hair right out of the gate with actual styling tools (taking the hint yet, Maya?). UV's? Fugetaboutit! Just style the hair and get to UV's later! This isn't to say that UV's don't matter at all, but Shave does an amazing job of distributing hair when UV's still look like this: "RTEBNHREREBTRtrntiorngreoin02942"
I'll admit that Maya's hair system is still top dog when it comes to simulation, but I don't even care at this point.
So why not just get Shave and a Haircut?
People shouldn't have to! Maya costs 3x more than the average computer. It has a hair system. The hair system should work! Shave and a Haircut is good, but if I want to style my hair with it, but simulate it using Maya's hair system, it takes an act of congress.
I'm not even going to dignify rendering with a rant. I just hurts too much. Just bite the bullet and get Renderman if you can. I can't, so all my hair looks like crap.
Fur. Oh fur. Your UV's have to be impeccable, like the Queen of England, or your fur will look horrible. The only way I know of to style fur is to paint maps and icky things like that. Bleh.
[End rant]
What was I talking about? Oh. nHair. I'm happy for it. It's been on my wish list for 5 years, so I hope it does come out with Maya 2013, as well as a collapsing feature in the script editor, nFur, burn Mental Ray at the stake, and create an nCloth Deformer. I'd looooooove that. I'm tired of using Wrap Deformers. They get the job done, but they're not the most accurate things in the world and you can get weird problems with them.
The title says is all. I'm a little discouraged today. Why? I feel like no one wants a Hair/Cloth/Fur TD. I love what I do and I think I'm good at it. I'd love to work on hair, cloth and fur for ever and ever, but I see so few people looking for character fx artists. I love effects (especially particle effects), I love rigging, and I think if I were to buckle down and do absolutely nothing but FX tests and rigs for, like 9 months, I could build enough on what I already know and produce good results and find a decent entry level job. But I don't want to get a job doing something that I just happen to know how to do well. I want to get a job doing something that makes me happy.
Someone on CGTalk had 100+ objects in their scene where the transformations had been reset. He needed their world space positions restored. Plainly speaking, he needed to unfreeze transformations. Technically that isn't possible, but there's a way to cheat everything.
There's probably a more efficient way to do this. If someone reply's to my post on CGTalk with a better version, I'll post their version, credit them, and provide a link to their post. In any case, here's the "Unfreeze Transformations" script. I hope it helps someone.
//Get all of the selected items, and the size of the selection
string $selection[] = `ls -sl`;
int $size = size($selection);
int $i; //for each object in the selection, do the following things:
for ($i = 0; $i < size($selection); $i++){ //Create two locators. #1 stays at the origin (0 0 0) while #2 moves to the center of the selected object.
string $zeroLoc[] = `spaceLocator`;
string $loc[] = `spaceLocator`;
string $ptCon[] = `pointConstraint $selection[$i] $loc`;
string $orCon[] = `orientConstraint $selection[$i] $loc`;
//Get the translation and rotation values of the locator we just moved. These are the values that we'll give to the object in a few steps.
float $tran[] = `xform -q -t -ws $loc`;
float $rot[] = `xform -q -ro -ws $loc`;
//Delete the constraints, we don't need them anymore
delete $ptCon;
delete $orCon;
//Move the selected object to the 0 0 0 locator (that's at the origin), then delete the constraints.
string $ptConZero[] = `pointConstraint $zeroLoc $selection[$i]`;
string $orConZero[] = `orientConstraint $zeroLoc $selection[$i]`;
delete $ptConZero;
delete $orConZero; //Freeze Transformations on the object. Now the objects values are zeroed out and it's at the origin
makeIdentity -apply true -t 1 -r 1 $selection[$i];
//Move the object back to it's original position, using the translation/rotation values from the first locator we created and moved.
setAttr ($selection[$i] + ".translate") $tran[0] $tran[1] $tran[2];
setAttr ($selection[$i] + ".rotate") $rot[0] $rot[1] $rot[2];
//Delete the two locators we created, we don't need them anymore.
delete $zeroLoc;
delete $loc;
}
I recently finished two MEL scripts that I hope will help you guys out. Both of these are for Windows users. Thanks to the kind people at CGTalk that helped me when I was stuck.
Snapshot
1) Snapshot. Creates a snapshot of the active viewport and saves the image in a Snapshot folder, located in your project directory. This should save you the hassle of taking and editing screenshots.
NOTE: Because of a glitch in Maya 2012, the only image format you can have is an .iff. I'm working on this. Hopefully I can get a workaround working soon.
Match It!
2) MatchIt! Will match the translation/rotation of one or more objects to your source object. You're able to choose the affected axes.
Let me know if you want one of them and I'll send them to you.
~Melissa
PS Sorry about nCloth for Novices #2. I noticed and error and deleted it. It should be up again shortly.
I told you I'd post these eventually. Two more nCloth for Novices tutorials. Watch them in full HD!
#2 just talks about setting up your scene for cloth simulation. #3 talks a little about modeling cloth and if you should use quads or triangles. I think digital tutors did something like this, but I rambled on about other things during my tutorial/talk. If you have any comments or questions, let me know. If you want me to do a tutorial on something, feel free to ask me.